
Hydraulic systems are at the heart of many heavy-duty outdoor and construction operations. From powering wood splitters to driving skid-mount equipment, these systems demand precise setup and ongoing care. Among the most important safety components in any hydraulic circuit is the relief valve — a device engineered to control pressure and shield the entire system from dangerous overloads.
In this guide, we will walk you through the complete process of setting a relief valve on your hydraulic system. Whether you are a seasoned operator or just getting started with hydraulic-powered tools, understanding this procedure is essential for safe, efficient performance and long equipment life.
🔧 What Does a Relief Valve Actually Do?
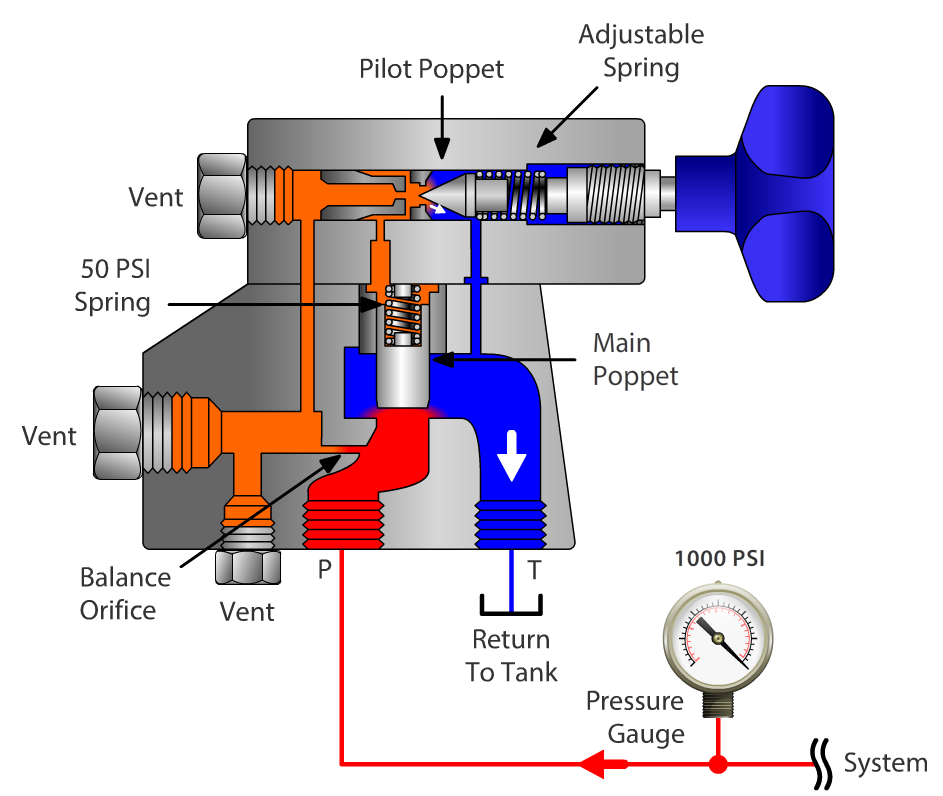
A relief valve functions as a pressure-limiting safeguard within your hydraulic circuit. When internal pressure climbs past a designated threshold, the valve opens automatically and diverts excess fluid back to the reservoir. This protects pumps, hoses, cylinders, and fittings from catastrophic failure. Properly calibrating this valve ensures your system operates consistently within its designed pressure window — preventing accidents and avoiding expensive downtime.
Get to Know Your Hydraulic System
Before touching any adjustment screw, take the time to fully understand your hydraulic setup. Identify every major component — the pump, control valves, actuators, fluid reservoir, and hoses. Review the manufacturer's specifications for your system's maximum rated pressure and the recommended relief valve setting range. Having this knowledge upfront prevents guesswork and ensures you make informed, safe adjustments from the start.
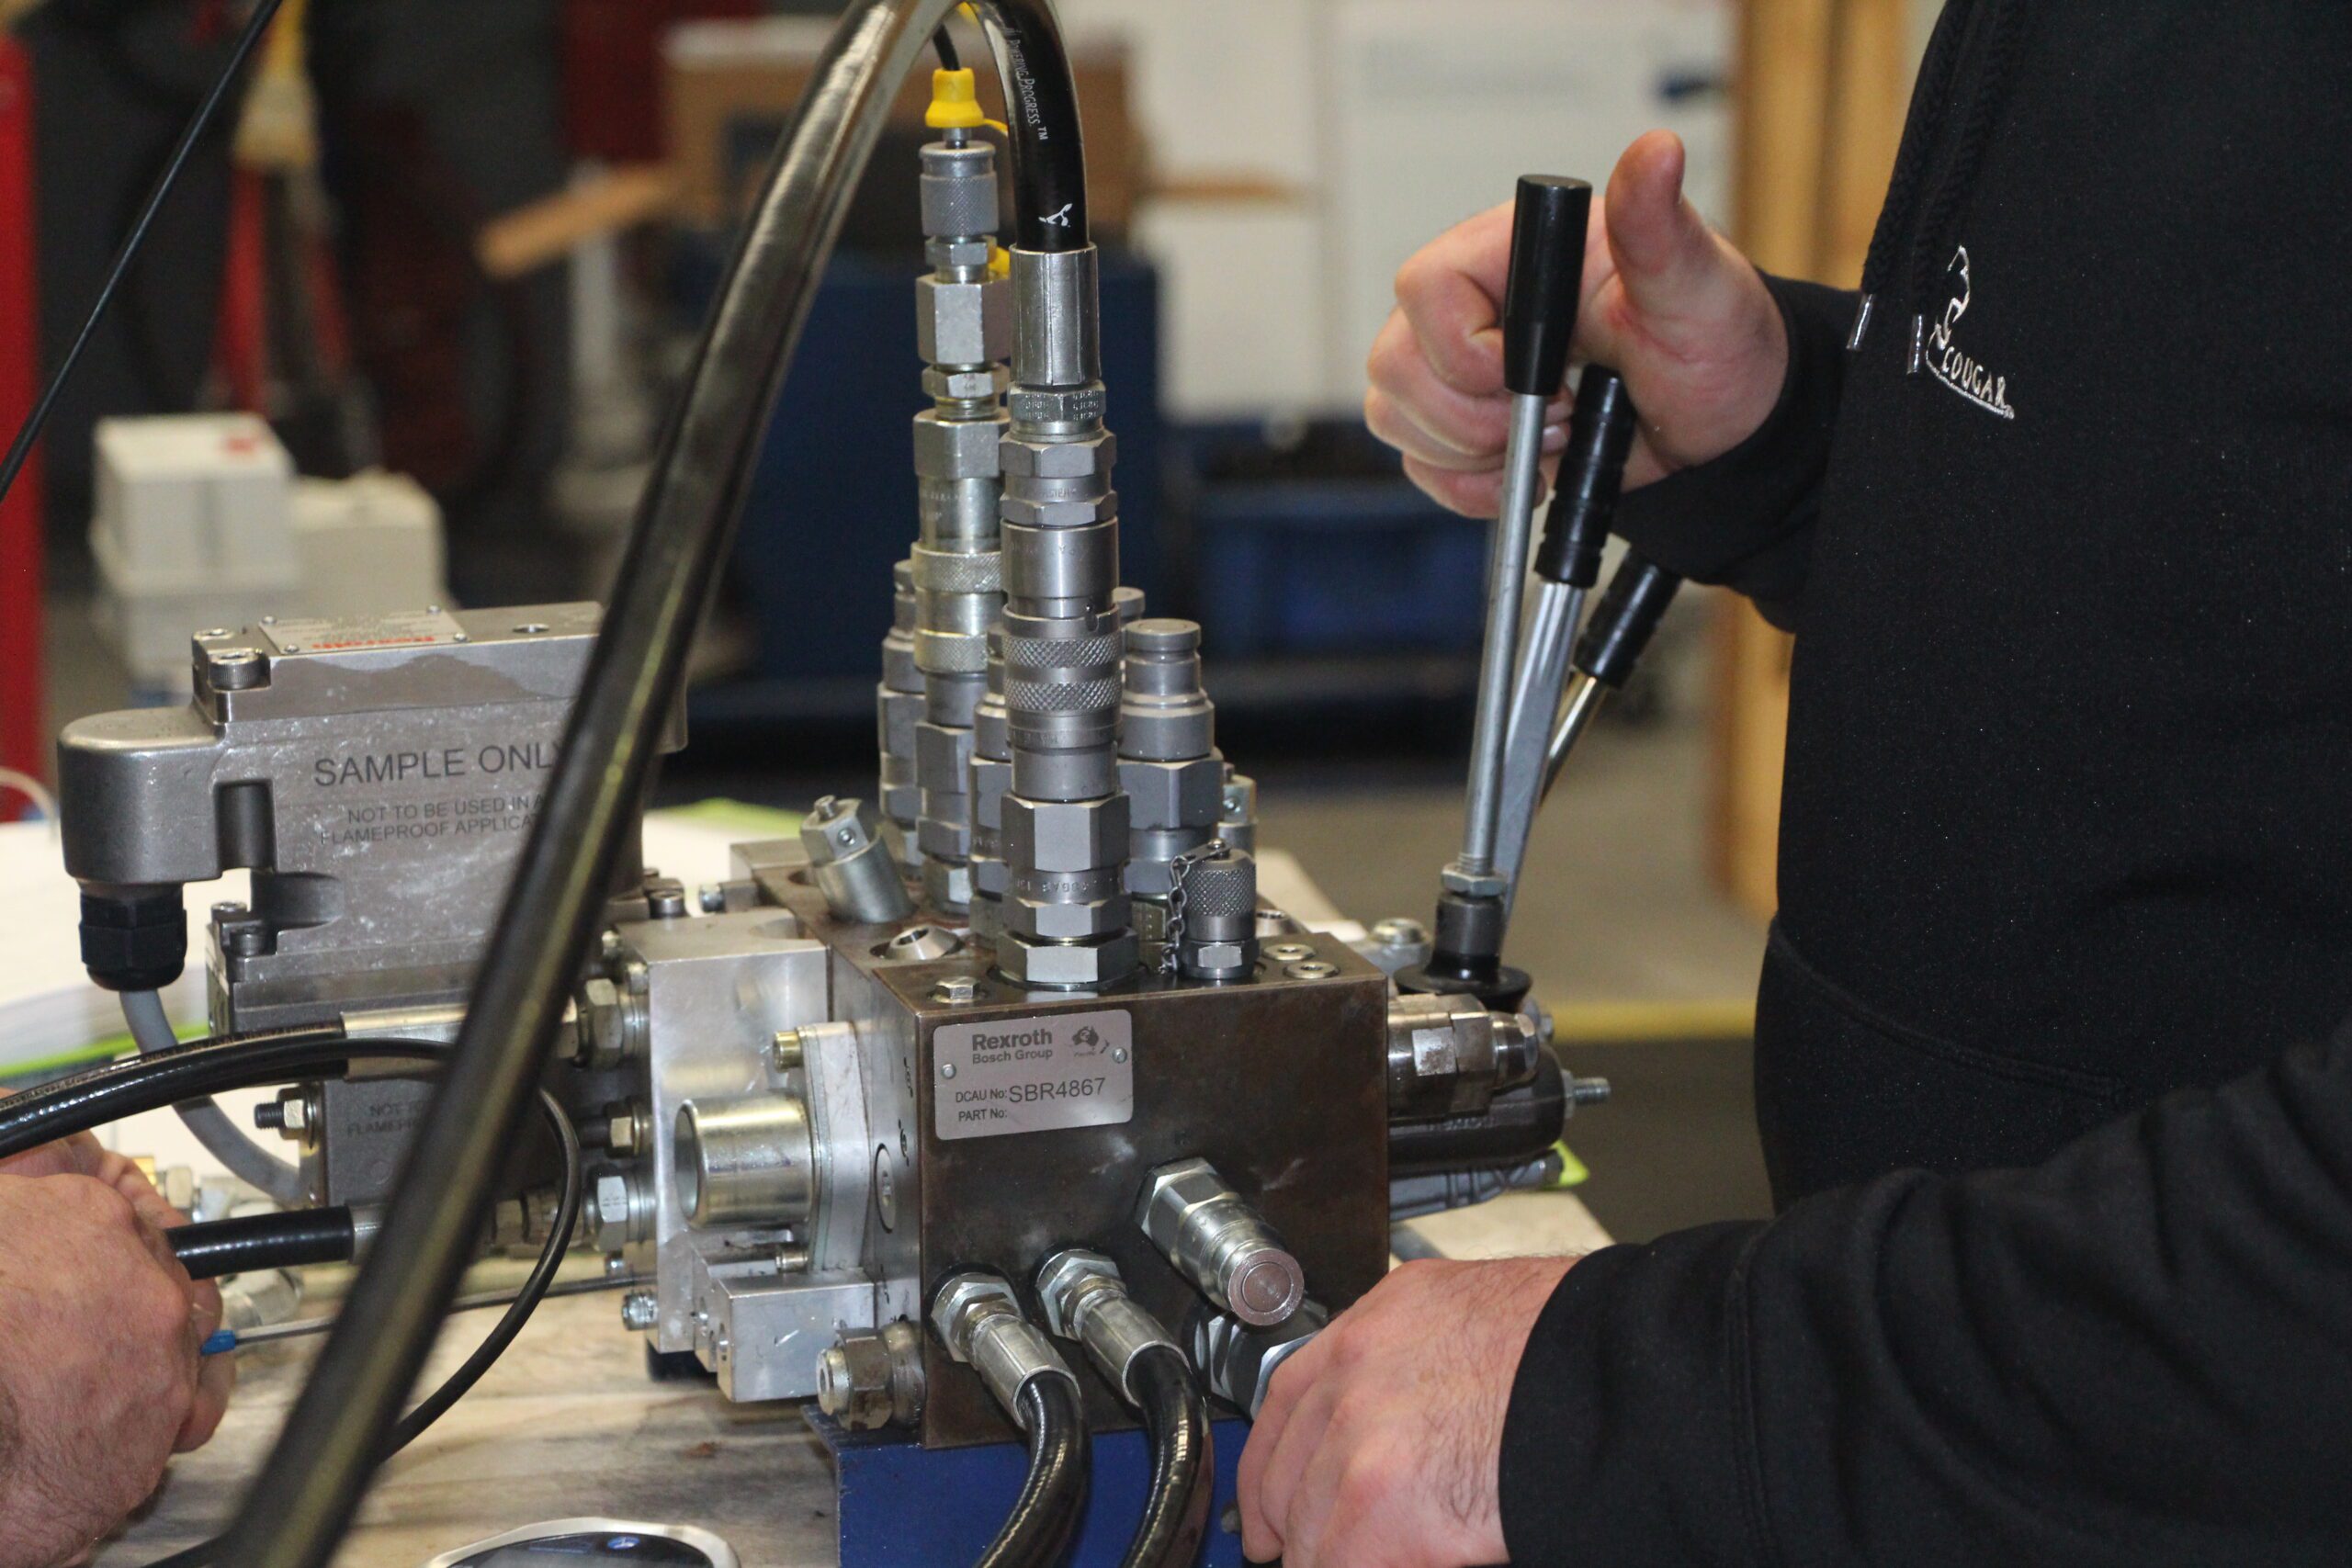
Locate the Relief Valve
The relief valve is most often mounted near the hydraulic pump or integrated into the valve block assembly. If you are having trouble finding it, consult your equipment's technical manual or reach out to a qualified hydraulic technician. Positively identifying the correct valve before making any changes is critical — adjusting the wrong component could lead to serious system damage.
Confirm Normal Operating Pressure
Prior to any valve adjustment, verify that the hydraulic system is running at its standard operating pressure. Watch the pressure gauge carefully and allow the system to stabilize within its normal range. This baseline reading is essential — without it, you have no reliable reference point for calibrating the relief valve accurately.
Make Gradual Adjustments to the Valve
Using the correct wrench or adjustment tool, begin turning the relief valve setting in small, controlled increments. Whether you need to raise or lower the pressure relief point, patience is key. Monitor the pressure gauge continuously as you make each adjustment, and observe how the system responds to every change. Rushing this step is one of the most common causes of improper valve settings.
Monitor the System's Behavior
While making adjustments, keep your senses engaged. Listen for abnormal sounds — whining, knocking, or hissing — and watch for fluid leaks or unexpected pressure drops. Any of these warning signs could point to underlying issues such as worn seals, fatigued hoses, or internal component damage. If anything seems off, stop immediately and seek the advice of a hydraulic specialist before proceeding.
Test and Confirm Proper Operation
Once the relief valve is dialed in to the target pressure range, it is time to put it to the test. Slowly ramp up system pressure and watch the valve's response. It should crack open smoothly when pressure exceeds the set limit, redirecting fluid back to the tank. Confirm that it reseats cleanly when pressure drops back down. Run through this cycle several times and watch for any irregular system behavior during testing.
⚠️ Essential Safety Reminders
Personal Protective Equipment (PPE)
Never work on a hydraulic system without proper PPE. At minimum, wear safety goggles, heavy-duty gloves, and protective clothing. Hydraulic fluid under pressure can cause severe injuries — treat every interaction with the system seriously.
System Shutdown Protocol
Before beginning any relief valve adjustment, fully shut down the hydraulic system and allow it to depressurize completely. Residual pressure in lines and cylinders is a leading cause of workshop injuries. Follow your equipment's lockout/tagout procedures without exception.
Professional Consultation
If you are uncertain about any part of this process, do not hesitate to consult a certified hydraulic technician. Hands-on training programs are widely available and can bring you up to speed quickly. A few hours of professional guidance can save thousands in repairs and, more importantly, keep you safe.
Correctly calibrating the relief valve on your hydraulic system is one of the most impactful maintenance tasks you can perform. It directly determines how well your equipment handles pressure spikes, how long components last, and how safely you can operate day after day. By following the step-by-step approach outlined above and never cutting corners on safety, you can keep your hydraulic tools performing at their best for years to come.
If you ever have doubts or run into something unexpected during the process, reach out to an experienced hydraulic professional. Your safety and the longevity of your equipment always come first. Stay safe, stay prepared, and enjoy the power and reliability of a properly maintained hydraulic system.