
Master the Art of Perfectly Roasted Meats with Expert Tips & Techniques
Transform your backyard grilling experience with the timeless art of rotisserie cooking. Whether you're preparing a succulent roast, tender chicken, or flavorful ribs, rotisserie cooking delivers unmatched results with minimal effort. The constant rotation ensures even cooking, creates a beautiful caramelized exterior, and locks in natural juices for incredibly moist and flavorful results. This comprehensive guide will walk you through everything you need to know about setting up and mastering rotisserie cooking on charcoal, gas, and pellet grills.
How to Set Up a Rotisserie on a Charcoal Grill
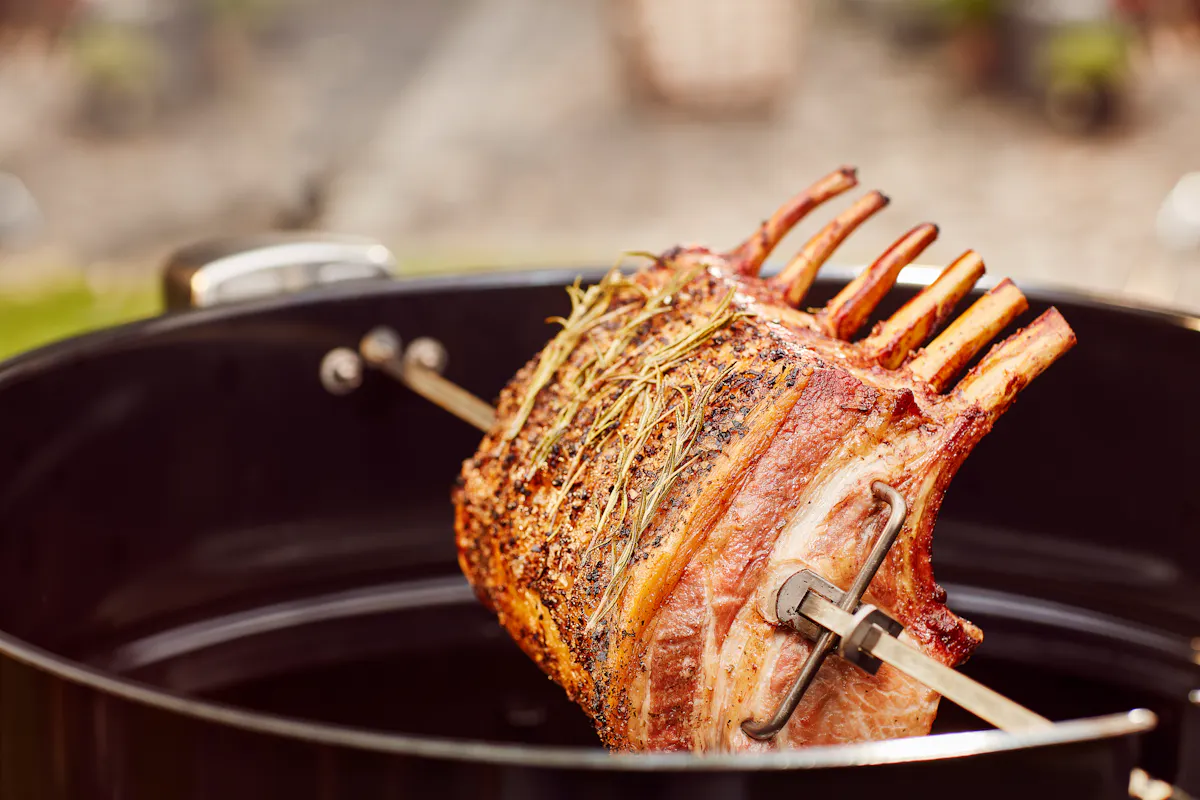
Rotisserie cooking on charcoal grills provides exceptional flavor through the natural heat and smoke. The key to success lies in proper setup and understanding indirect heat principles. Follow these detailed steps to achieve restaurant-quality results every time.
Step-by-Step Setup Process
1. Ready the Rotisserie Ring
Position the rotisserie ring on your grill. This accessory sits on top of your charcoal ring and provides the stable foundation needed for rotisserie cooking.
2. Set Up for Indirect Heat
Fill a chimney starter with briquettes and light them. Once the coals are white-hot with ash covering the outer layer, it's time to arrange them for optimal indirect cooking.
3. Arrange the Charcoal Baskets
Place charcoal on opposite sides of the grill to create indirect heat zones, allowing the meat to cook evenly without direct flame exposure.
4. Position Your Drip Pan
Set a drip pan in the center of the grill between the charcoal baskets to catch drippings and prevent flare-ups.
5. Secure the Rotisserie Spit
Carefully load your meat on the spit and secure it with the forks, ensuring the weight is balanced for smooth rotation.
6. Ignite the Rotisserie Motor
Turn on the motor to ensure the meat rotates steadily while cooking, providing even heat distribution.
7. Mount the Grill Lid & Start Cooking
Secure the lid to trap the heat and let the rotisserie work its magic. Monitor the internal temperature to ensure perfect doneness.
8. Adjust the Cooking Temperature
Maintain optimal cooking temperatures by adjusting the grill vents. Open vents increase heat, while closing them reduces temperature.
9. Maintain Consistent Heat
Add fresh charcoal and wood chips for sustained heat and enhanced flavor. Expect to add fuel every 30 to 45 minutes for longer cooking sessions.
10. Perfect Your Temperature Control
Close the lid and use the grill's thermometer to maintain optimal cooking temperatures, typically between 300°F and 350°F.
11. Monitor & Finish to Perfection
Check the cooking time of the meat you are cooking to ensure it reaches optimal internal temperature without overcooking.
12. Remove with Care
Lift the meat cover on the spit after turning off the motor and let it rest. Slice and enjoy the perfectly roasted meat bursting with flavor.
How to Set Up a Rotisserie on a Gas Grill
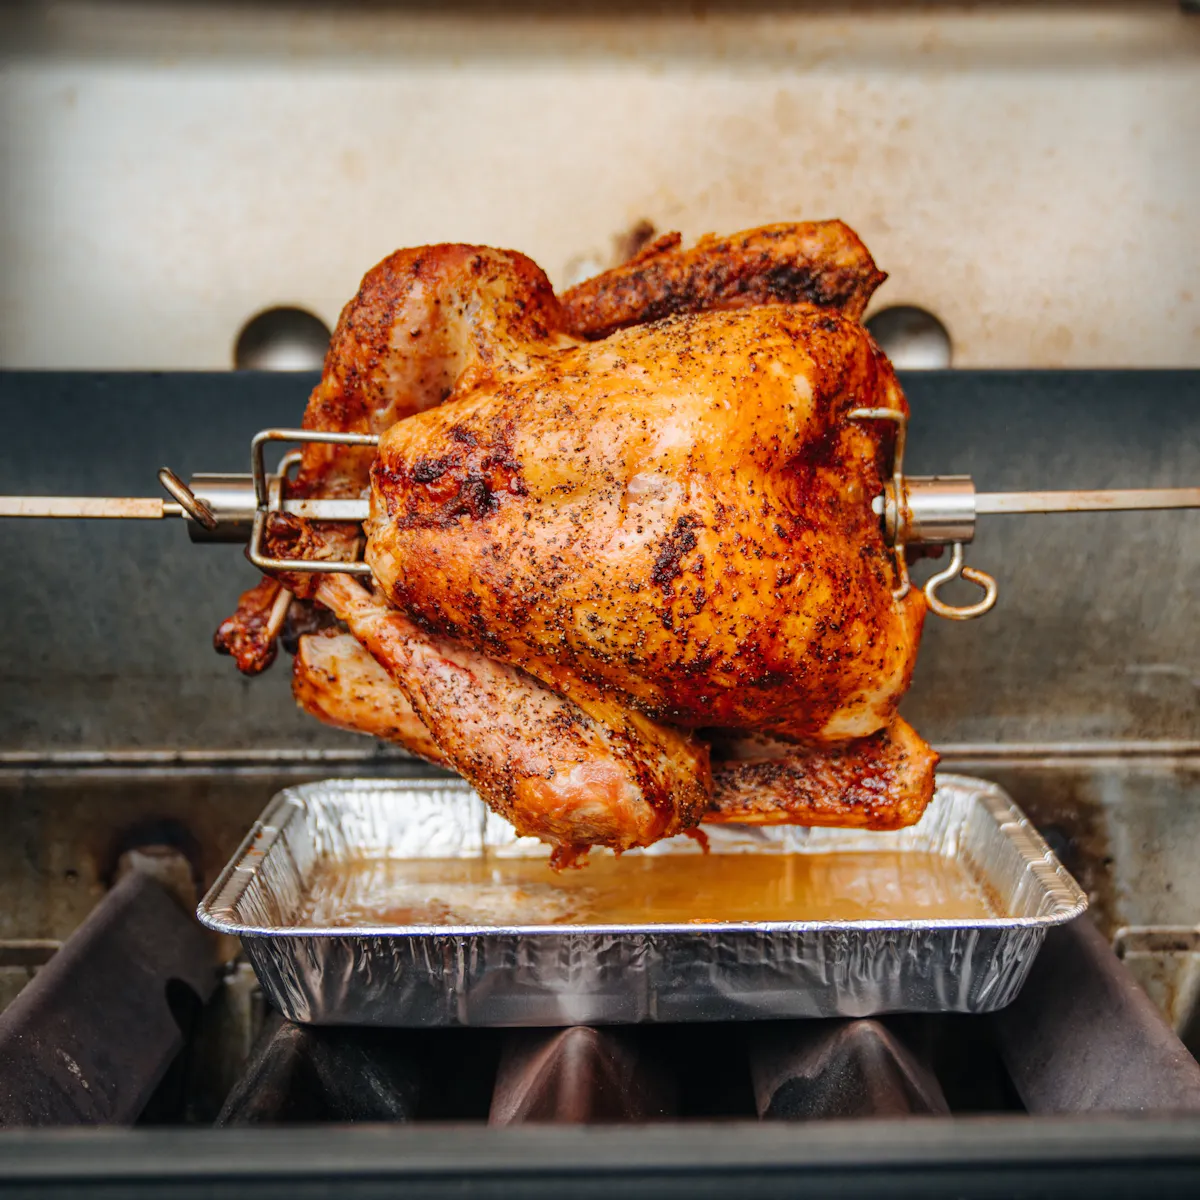
Rotisserie cooking on gas grills is incredibly simple and delivers gas-controlled control over the heat. The convenience of temperature regulation combined with the rotating motion creates perfectly cooked meats with minimal supervision.
Gas Grill Setup Instructions
1. Attach the Rotisserie Bracket
Mount the rotisserie bracket onto your grill using the included hardware and plug in the motor securely.
2. Prepare the Grill
Remove the standard warming rack and any grill grating that interferes with the rotisserie function.
3. Position the Drip Pan
Arrange the rotisserie drip pan so you can quickly capture grease from the meat. This prevents messy cleanup and reduces flare-ups.
4. Configure Burners for Indirect Heat
Turn off the center burner if using a three-burner or multi-burner grill, or turn off one side if you're using a two-burner model to create ideal indirect cooking conditions.
5. Prepare Your Meat
Load the meat onto the spit, ensuring it's secured with the forks. Verify that the load is balanced to avoid wobbling during rotation.
6. Engage the Rotisserie System
Position the loaded spit into the brackets and turn on the motor. Observe that the meat rotates smoothly and evenly.
7. Preheat the Grill
Turn on the appropriate burners and heat the grill to the correct temperature for your specific meat selection.
8. Install the Lid and Start Roasting
Lower the grill lid and let the rotisserie cook until the food is cooked to within the perfect portion of done. Turn on the burner and let heat do its work.
9. Fine-Tune Heat Levels
Close the lid and use the grill's thermometer to reach optimal cooking temperatures of 300°F to 350°F for most meats.
10. Enhance with Smoke
Add wood thermometers to impart extra depth. Simply position them below the active burner for light woodsy temperature enhancement.
11. Safely Remove & Rest
Lift the roast cover on the spit after switching off the rotisserie burner, allowing the heat to rest. Slice and savor the juicy, even-roasted perfection.
How to Set Up a Rotisserie on a Pellet Grill
![]()
A pellet grill offers precise temperature management while delivering rich, smoky flavor that's ideal for slow-roasted meats on a rotisserie. The combination of automated temperature control and continuous wood smoke creates exceptional results every time.
Pellet Grill Rotisserie Setup
1. Install the Rotisserie Bracket
Attach the rotisserie bracket to your pellet grill using the included hardware and plug in the motor.
2. Prepare the Cooking Surface
Remove the rotisserie drip pan so you can locate enough support for the meat. This creates clearance for proper rotation.
3. Set Up to 225°F
Start the grill at a low 225°F to begin the cooking process. This ensures a gentle, consistent cook that retains moisture.
4. Prepare the Rotisserie Spit
Position the food onto the spit and secure it tightly with the forks.
5. Balance for Smooth Rotation
Make sure it is positioned and balanced for even cooking.
6. Activate the Motor
Install the loaded spit on the brackets and start the motor to commence rotation.
7. Begin the Cooking Process
Lower the grill lid and let the meat cook slowly until it reaches the perfect internal temperature. For ultra-low and slow method rotisserie meat, this process produces the fall-apart tender texture desired.
8. Remove & Serve
Lift the roast over on the spit after turning off the power to allow the heat and juices to rest. Slice and enjoy the intensely marinated juicy bursting with a rich smoke aroma.
Rotisserie Cooking Tips & Best Practices
Balance for Even Cooking
If your meat doesn't turn evenly, it may be unbalanced. Adjust the positioning on the spit and test rotation before starting. A well-balanced spit ensures consistent browning and proper cooking throughout.
Use a Meat Thermometer
The best way to guarantee perfectly cooked rotisserie meat is to check internal temperature. Don't rely solely on cooking time, as variables like meat thickness and outdoor temperature affect results.
Time for Flavor
If you truly want to elevate flavors, try brining or using a flavorful marinade before beginning rotisserie cooking. A delicious cook up is always better with great preparation and a flavorful base to start from the interior out.
Save the Drippings
Don't let those precious drippings go to waste! Collect them in your drip pan and use them to make gravies, sauces, or for basting during cooking. The concentrated flavors add incredible depth to any dish.
Let It Rest
After removing meat from the rotisserie, always allow it to rest for 10-15 minutes before carving. This crucial step allows juices to redistribute throughout the meat, ensuring every slice is moist and flavorful.
Keep the Lid Closed
Resist the temptation to constantly check on your meat. Opening the lid releases heat and extends cooking time. Trust the process and only open when necessary to check temperature or add fuel.
Ready to Master Rotisserie Cooking?
Elevate your outdoor cooking experience with premium rotisserie equipment designed for exceptional performance and durability. Whether you're roasting chicken, prime rib, or lamb, having the right tools makes all the difference.
Cal Flame Rotisserie KitStart Your Rotisserie Journey Today
Rotisserie cooking transforms ordinary grilling into an extraordinary culinary experience. The self-basting action of continuous rotation, combined with the gentle indirect heat, produces meats that are impossibly juicy on the inside with a perfectly crispy, golden exterior. Whether you're cooking on charcoal, gas, or pellet grills, the principles remain the same: proper setup, temperature control, and patience.
With the techniques outlined in this guide, you're now equipped to create restaurant-quality roasted meats in your own backyard. Remember that practice makes perfect, and each rotisserie session will build your confidence and skills. Don't be afraid to experiment with different seasonings, marinades, and cooking times to discover your signature rotisserie style. The beauty of rotisserie cooking lies in its forgiving nature and spectacular results, making it accessible to beginners while offering endless possibilities for experienced grill masters.