
So you've decided to harness the power of the sun — great choice. But before your solar panels can start generating electricity, they need to be properly mounted. The mounting material you choose and where you place your panels will directly affect their performance, longevity, and how much energy they produce. Whether you're setting up a rooftop array, a ground-mounted system, or something more portable for your RV, the right approach makes all the difference.
Choosing the Right Materials for Solar Panel Mounting
Not all mounting materials are created equal. The one you pick depends on your budget, where you're installing, and how long you want your setup to last. Here's a breakdown of the most commonly used options:
Aluminum
Lightweight, strong, and highly resistant to corrosion. Aluminum is the most popular choice for solar mounting because it's easy to work with and won't rust over time. It pairs well with almost any roof type and holds up in all weather conditions.
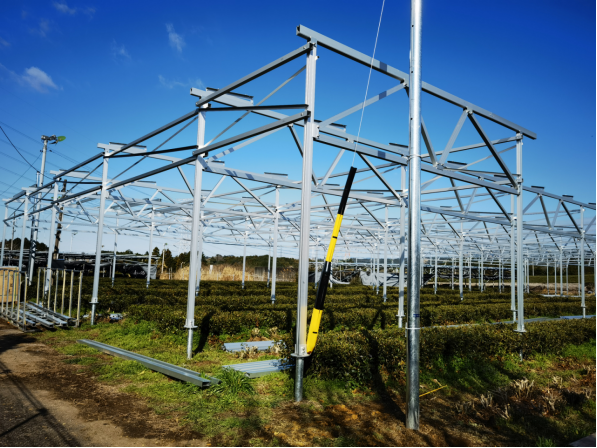
Angle Iron
This galvanized steel option is budget-friendly and quick to assemble. However, it can corrode over time if the protective coating wears off, and the bolts and brackets are vulnerable to loosening — especially in high-wind regions.
Stainless Steel
Durable and corrosion-resistant, stainless steel is built to last for decades. It's a bit harder to work with and costs more upfront, but it's an excellent long-term investment for permanent solar installations.
Wood
Readily available and easy to handle, wood is often used for temporary or DIY frames. The downside is it degrades faster than metal alternatives, especially when exposed to moisture. Treated lumber or UV-rated clips can extend its life somewhat.
Each material has its trade-offs. Your choice should factor in the climate in your area, your project budget, and whether the installation is meant to be permanent or temporary.

Where to Mount Your Solar Panels
The location you pick for your solar panels matters just as much as the panels themselves. The ideal spot is whichever flat surface on your property gets the most consistent, unobstructed sunlight throughout the day. Here are the most popular options:
🏠 Residential Roof
A rooftop installation is often the best option for homeowners. Depending on your location, rooftop panels are less likely to be affected by shade or other factors that diminish electricity generation compared to lower areas of the property. You can mount solar panels on nearly any roof type — including residential shingles, clay tiles, metal sheeting, and even flat commercial rooftops.
One thing to keep in mind: rooftop installation can be tricky depending on the direction your roof faces and its angle. You'll also want to consider the age of your roofing material — the average residential roof needs replacing every 25 years. If yours is nearing the end of its lifespan, it's best to replace it before adding solar panels on top.
A properly installed solar mounting system shouldn't cause damage to your roof if done correctly. In fact, the panels can actually help shield your roofing material from UV rays, hail, and rain — extending its life.
🚐 RV or Van Roof
Solar panels are quickly becoming the standard for powering appliances in RVs and camper vans. You can mount a panel array to the top of your vehicle to capture solar energy while parked or even while on the move. For curved or irregular surfaces, flexible solar panels tend to be easier to work with. You can also mount them on curved or uneven surfaces to maximize your energy output.
📍 Pole in the Ground
Mounting your solar panel on a pole allows you to precisely adjust the panel's angle to match the sun's seasonal position in the sky. The trade-off is that pole setups usually limit you to a single panel and are best suited for off-grid or low-demand situations where large arrays aren't necessary.
🌿 Ground Mounting
If you don't have suitable roof space — or if your roof is shaded or has a poor angle — ground mounting is an excellent alternative. Placing panels on the ground gives you the freedom to reposition them throughout the day to capture maximum sunlight. It's also much easier to clean and maintain ground-level panels. The main requirement is open space and a flat area free from obstructions.
Permanent ground-mounted arrays are the go-to for large-scale commercial solar setups. Ground frames typically require concrete footings that can support significant loads.
🪟 Window Mount
A window-mounted panel is a cost-effective solution if you only need a small amount of electricity to supplement your main power source or to keep backup batteries topped off. It works like a balcony setup — using suction cups or clamps to hold the panel in place. For spaces like apartments where rooftop access isn't possible, this is a practical alternative, though it won't produce as much power as larger setups.
🧱 Wall Mount
If you have a south-facing wall that receives strong, direct sunlight throughout the day, wall mounting can be a smart option — especially for smaller rigid panels. A wall-mounted panel can serve as an alternative to a full rooftop PV system while still generating meaningful power output.
How to Mount Solar Panels Yourself
Want to save money by skipping the professional installation fee? Here's a detailed, step-by-step DIY guide to help you mount your panels with confidence. For this walkthrough, we're using the EcoFlow Tilt Mount Bracket for the EcoFlow 400W Rigid Solar Panel as an example.
Depending on the specific factors of your installation — roof type, panel size, mounting hardware — your process may differ slightly. But the general principles below apply to most standard rigid panel setups.
Make sure to read your equipment manuals thoroughly before proceeding with the installation.
Plan and Prepare
Start by gathering all the necessary tools for a DIY installation. Other preparations include getting the right permits and checking local requirements for mounting structures on your roof or property.
Depending on where you're installing the system, you may need to satisfy additional safety requirements. For a ground-mounted system, this could mean ensuring a clearance perimeter around the panels and keeping them free of nearby vegetation.
You'll also want to be aware of any wind zones, flood zones, or environmental factors that could affect the stability of your setup. Municipal building codes might apply, so check with your local authority before beginning work. For example, installing a ground array in an area that frequently floods or experiences severe weather events could lead to problems down the line.
Attach the Fixing Bracket to the Solar Panel
Once you've gathered all your tools and reviewed the permits and safety requirements, it's time to begin the actual mounting process.
The first step is to attach the fixing bracket to the solar panel. Lay the panel face-down on a flat surface or on a towel to protect the photovoltaic cells.
Line up the mounting holes on the back of the panel with the corresponding holes on the fixing bracket. Don't overtighten the screws — just make them snug. Consult your panel's user manual to confirm the correct hardware and torque specifications.
Attach the Fixing Bracket to the Panel's Mounting Hole
Now that you've aligned the bracket, go ahead and properly secure the fixing bracket to the mounting holes on the panel using the included bolts.
Repeat this on the opposite side of the panel. Make sure the bolt alignment is symmetrical and that the mounting bolts sit at the same level on both sides.
Attach the Other Leg of the Fixing Bracket
Connect the other leg of the fixing bracket to the first leg, joining them together at one end. It's easier to tighten the screws by hand initially so you can adjust the bracket to the proper tilt angle before locking everything into place.
Do the same on the opposite side so that you have all four legs of the fixing bracket properly attached.
Attach the Adjustable Bracket to the Fixing Bracket
Next, attach the adjustable bracket to the fixing bracket. Do this on both sides.
When you adjust the tilt bracket, make sure the installation tilt angle is at least 10 degrees. If you set it lower than that, there's a higher chance of dust accumulation and reduced performance. If the tilt angle goes below 10 degrees, take extra care to keep your panels clean on a regular basis.
It's essential to think carefully about the tilt angle of your solar panels to maximize the amount of sunlight they capture and convert into usable energy. Several factors influence the ideal tilt — including your geographic latitude, the season, and the time of year.
Your goal is to position the panels so they face the sun as directly as possible. Factors that determine the best angle for your specific setup include latitude, roof pitch (if applicable), and the time of year you want to optimize for.
Want your panels to automatically track the sun and optimize their tilt angle throughout the day? Consider the EcoFlow Solar Tracker, which continuously adjusts the panel's orientation to follow the sun's path. Solar trackers can be especially useful in areas with long summer days.
Once you've decided on the tilt angle and adjusted the mounting hardware, you're ready to install the PV panel.
Connect Multiple Panels (Optional)
If you're setting up more than one panel, you can connect them in series or in parallel. Just make sure there's at least a 25mm (1-inch) gap between adjacent panels. The distance between the frame of one panel and the installation surface should be a minimum of 40mm (1.5 inches) for proper ventilation and airflow.
Proper spacing helps prevent overheating, which can reduce panel efficiency over time. It also makes future maintenance and cleaning much easier.
Ready to get started with your solar panel installation? Check out our featured product below:
EcoFlow 400W Rigid Solar PanelFinal Thoughts
Mounting solar panels doesn't have to be intimidating. With the right materials, a solid plan, and careful attention to safety and building codes, a DIY solar panel installation is well within reach for most homeowners. The key is to take your time during the planning phase, choose the mounting location that gives you the best sun exposure, and follow each step methodically.
Whether you're outfitting your rooftop, setting up a ground-mounted array in your backyard, or adding a panel to your RV for off-grid adventures — the steps above will help you get the job done right. Happy solar mounting!