
Imagine the freedom of parking anywhere without worrying about power. Adding solar panels to your campervan is one of the most transformative upgrades you can make. Whether you need to charge your devices, keep your fridge running, or power your lights through the night, a well-designed solar setup delivers true independence wherever your adventures take you.
This comprehensive guide walks you through a real-world installation process, covering everything from understanding your dual battery system to the final testing phase. We have included practical advice and insights from actual installations to help you succeed.
Understanding Your Dual Battery and Solar Configuration
A dual battery system equips your vehicle with two separate power sources working in harmony:
Starter Battery
Powers your engine and standard vehicle electronics. Typically located under the bonnet, though in classic vans like the Toyota HiAce or VW Transporter, you might find it beneath a seat.
Auxiliary Battery (House Battery)
Dedicated to your camping equipment including your refrigerator, lighting, fans, and USB charging ports. This separation ensures you never drain your starter battery while parked.
While driving, your alternator charges the auxiliary battery. When stationary, your solar panels take over to maintain charge, ensuring you are never stranded without power.
Charging Management Options:
DC-DC Charger with Solar Input: Handles both alternator and solar charging simultaneously. Essential for vehicles with smart alternators (most modern vans and 4WDs) or lithium battery setups.
Solar Controller (PWM or MPPT): Manages solar charging exclusively. Pair it with a basic isolator for alternator charging. Perfect for older vehicles or budget-conscious builds.
Essential Equipment Checklist
12V Solar Panel
Rigid, flexible, or portable
Solar Controller or DC-DC Charger
PWM or MPPT
Deep Cycle Battery
AGM or Lithium
Wiring
6mm² or 8 B&S
30A Fuse or Circuit Breaker
System protection
Tools & Accessories
Drill, crimper, multimeter
Premium Solar Panel for Your Build
High-efficiency rigid solar panel with integrated mounting hardware
EcoFlow 400W Rigid Solar PanelPlan Your Setup
Before purchasing any components or drilling any holes, create a detailed wiring diagram and determine the optimal location for each component:
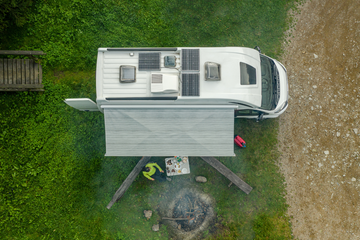
Solar Panel Placement: Roof-mounted panels offer set-and-forget convenience, while portable panels provide flexibility to park in shade and place the panel in sunlight.
Controller Location: Mount your solar controller or DC-DC charger as close to your auxiliary battery as practical to minimize voltage drop across the cables.
Cable Routing: Plan the path from panel to controller, then controller to battery. Use conduit or cable glands wherever cables pass through metal surfaces or walls.
Battery Position: Secure your auxiliary battery in a well-ventilated location such as under a seat, inside a drawer, or within a dedicated battery box. Battery boxes help organize cables and often include USB ports, circuit protection, and Anderson inputs.

Mount the Solar Panel
For rigid panels, secure them to your van roof using one of these proven mounting methods:
Z-Brackets
Ideal for flat roofs
Roof Racks with U-Bolts
Uses existing crossbars
Adhesive Brackets
No drilling required
Ensure your panel is firmly secured and slightly angled for optimal water runoff and sun exposure.
Important for Flexible Panels: These must have airflow underneath to prevent overheating and performance degradation. Use spacers or matting to create a small gap between the panel and your roof surface.

Run the Solar Cables Inside
Getting your cables from the roof into your van typically requires drilling a hole near your solar panel location. A waterproof cable gland is essential to seal the entry point against the elements.
Cable Gland Installation Process:
- Drill a hole just large enough to accommodate your cable
- Feed the cable through the gland and position it on the roof
- Apply UV-resistant sealant such as Sikaflex around the hole and base
- Tighten the gland to compress the rubber seal around the cable
- Allow 24 hours curing time before driving or washing
Pro Tip: Label your positive and negative cables before feeding them through the gland. This simple step saves considerable time and confusion during the connection phase.

4Install Your Charging Setup
You have two main options depending on your system requirements:
Option A: Solar Controller Setup
Mount your solar controller close to the auxiliary battery to minimize voltage drop and keep wiring short.
Connection Sequence (Critical):
1. Connect battery to controller first (positive and negative)
2. Then connect solar panel to controller (positive and negative)
This order is essential because most solar controllers must detect battery voltage before they can operate correctly. Connecting solar first can cause faults or prevent proper startup.
A PWM controller works well for smaller, budget-friendly setups. An MPPT controller delivers superior efficiency, especially when using high-voltage panels or operating in variable sunlight conditions.
Option B: DC-DC Charger with Solar Input
Install the DC-DC charger near your auxiliary battery in a well-ventilated area. These units feature three main inputs:
Alternator Input
Solar Panel Input
Auxiliary Battery
Connect in this order: battery first, then alternator input, then solar panel. DC-DC chargers automatically switch between alternator and solar charging depending on whether the engine is running. Fuse all inputs and connect solar last to avoid handling live voltage during installation.

Fuse the System
Protect your investment by adding a 30A inline fuse or circuit breaker on the positive wire between your solar controller and auxiliary battery. This critical safety component prevents overheating or fire risk in case of a short circuit.
When using Anderson plugs, position the fuse inline before the plug to maintain system safety during disconnect.
If you are powering multiple appliances such as a refrigerator, lights, and water pump, consider adding a fuse box or 12V distribution panel. This setup simplifies isolating individual circuits for maintenance or troubleshooting.

Secure and Test Your Connections
With everything connected, it is time for a thorough inspection and testing phase:
✓ Verify all connections are tight and secure
✓ Check for any exposed copper or loose wires
✓ Confirm your solar panel is receiving sunlight
Use a multimeter to verify that your battery voltage is rising. Most modern solar controllers display input voltage and charging status, and many now feature Bluetooth connectivity for convenient monitoring through smartphone apps.

Tidy Up Your Setup
Secure all cables using zip ties, conduit, or dedicated cable mounts. Avoid routing cables near sharp edges, leave some slack to accommodate vibration, and keep your installation clean and well-organized.
Label your components thoroughly, especially when using Anderson plugs or multiple fuses. Create a final wiring diagram and store it in your van for future reference during maintenance or upgrades.

Final Thoughts
Installing a solar panel system in your campervan is a rewarding project that delivers genuine freedom to travel off-grid without power anxiety. Once your system is operational, it quietly charges your batteries whenever the sun shines, providing reliable power with no noise, no fuel costs, and minimal maintenance.
If you are not confident working with electrical systems, consult a qualified professional, particularly when dealing with lithium batteries or high current devices. Safety should always come first.
Ready to Start Your Solar Journey?
Explore our premium range of solar panels and accessories for your campervan build
EcoFlow 400W Rigid Solar Panel