
Creating authentic, restaurant-quality pizza in your own backyard has never been more achievable. Whether you're working with traditional wood-fired flames or the convenience of modern gas-powered units, understanding the fundamentals of outdoor pizza oven operation transforms your cooking experience. This comprehensive guide walks you through everything from initial setup to achieving that perfect crispy crust with beautifully charred edges.
Building Your Outdoor Pizza Station
The foundation of exceptional outdoor pizza making begins with thoughtful preparation of your cooking space. Before your first pizza hits the stone, consider how you'll arrange your workspace for maximum efficiency and comfort. Your outdoor pizza kitchen should feel like a natural extension of your backyard entertainment area.
Essential First Step: Identify a heat-resistant, level surface for your pizza oven. Whether you're using a permanent outdoor kitchen setup or a portable countertop unit, stability and proper ventilation are non-negotiable safety requirements. Consider wind direction and proximity to seating areas when finalizing placement.
Creating Your Preparation Zone
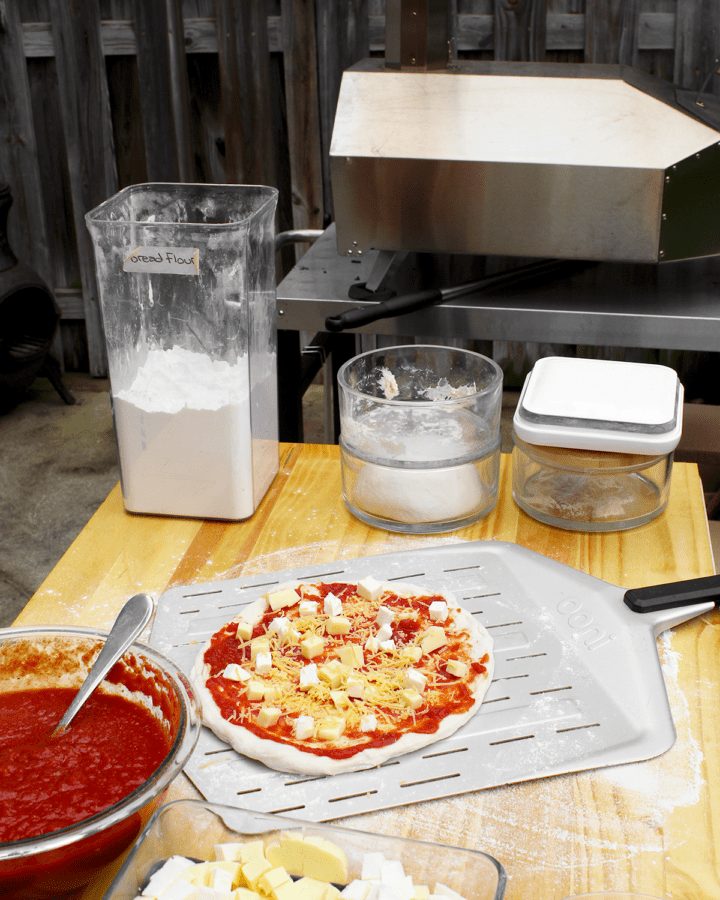
Professional pizzaiolos understand that organization makes the difference between chaotic cooking and smooth operation. Establish a dedicated prep station within easy reach of your oven. This workspace should accommodate your dough, sauce containers, toppings, and essential tools without crowding. Many outdoor chefs find success using portable folding tables or cart systems that can be positioned alongside the oven.
 The second critical consideration involves ingredient storage and accessibility. Fresh ingredients perform best when kept at appropriate temperatures until the moment of use. For extended outdoor cooking sessions, consider cooler solutions or insulated containers to maintain freshness. This attention to detail prevents multiple trips to your indoor kitchen and keeps you focused on the cooking process.
Must-Have Tools and Equipment
Once you've established your cooking area, assembling the right tools elevates your pizza-making capabilities from amateur to accomplished. While the oven itself is the centerpiece, several accessories prove indispensable for consistent results.
Temperature Management Essentials
Infrared Thermometer: This single tool revolutionizes your cooking accuracy. The most common beginner mistake involves guessing at stone temperature, leading to burnt or undercooked results. An infrared thermometer provides instant, accurate readings of your cooking surface. For optimal pizza cooking, target temperatures between 700-900°F depending on your style preferences. Neapolitan-style pizzas thrive at the higher end of this range, while thicker crusts perform better at slightly lower temperatures.
Dough Handling Equipment
Your dough preparation determines pizza success before it ever reaches the oven. Invest in quality pizza peels – both for launching and retrieving your creations. Wooden peels excel for initial dough preparation and loading, as their porous surface prevents sticking when properly floured. Metal peels, being thinner and more rigid, prove superior for rotating pizzas mid-cook and removing finished pies.
Additional considerations include a reliable dough scraper for portion control, quality measuring containers for consistent ingredient ratios, and appropriate storage vessels for bulk dough preparation. If you're planning a pizza party, pre-portioned, pre-shaped dough balls stored in oiled containers streamline the cooking process significantly.
Recommended Equipment for Superior Results
While a basic setup gets you started, certain premium equipment elevates the entire pizza-making experience. These investments pay dividends through improved consistency and expanded capabilities.
Long-Handled Tools for Safety
Working with surfaces exceeding 800°F demands respect and proper equipment. Extended-handle spatulas and turning peels allow you to manipulate pizzas, adjust positioning, and manage coals or flames without exposing yourself to excessive heat. These tools transform what might be an anxious experience into confident, controlled cooking.
Heavy-Duty Heat Protection
Standard kitchen gloves fail catastrophically around pizza ovens. Purpose-designed, heat-resistant gloves rated for high temperatures protect your hands and forearms during extended cooking sessions. Look for options that maintain dexterity while providing substantial protection – you'll need to handle peels, adjust vents, and manage fuel without compromising safety.
Many experienced outdoor pizza chefs recommend silicone-based gloves over traditional cloth options. They're easier to clean, maintain their protective properties longer, and resist moisture absorption that can compromise heat resistance.
Advanced Dough Solutions
For frequent pizza making, a dedicated dough mixing system saves considerable time and effort. Whether you opt for a stand mixer with dough hook attachments or a specialized dough mixer, consistent mechanical mixing produces superior gluten development compared to hand kneading. This consistency translates directly to better crust texture and structure.
Fuel Management and Heat Control
Understanding your heat source represents the difference between mediocre and magnificent pizzas. Wood-fired and gas-powered ovens each present unique advantages and learning curves.
Wood-Fired Oven Mastery
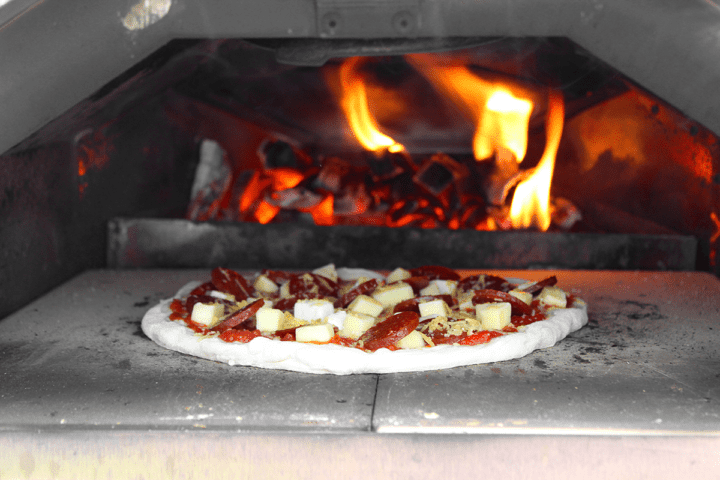
Traditional wood-fired cooking delivers unmatched flavor complexity through smoke infusion and radiant heat characteristics. However, this authenticity requires skill development and patience. Begin by selecting appropriate hardwoods – oak, maple, and fruitwoods like apple or cherry provide excellent results. Avoid softwoods like pine, which contain resins that produce unpleasant flavors and excessive smoke.
The wood fire management process starts 45-60 minutes before cooking. Build your initial fire toward the back or side of the oven, allowing flames to circulate and heat the cooking stone evenly. As the stone approaches target temperature, push coals to the sides or back, creating a clear cooking area while maintaining heat. This technique provides both direct flame heat and radiant stone heat simultaneously.
Gas-Powered Convenience
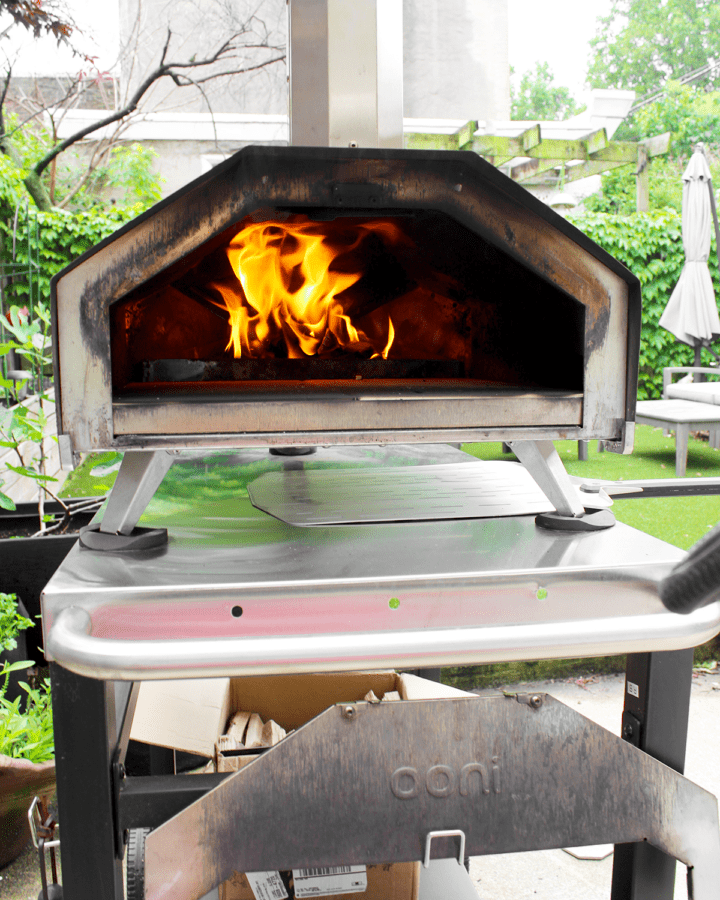
Modern gas-powered pizza ovens deliver remarkable performance with significantly reduced learning curve and preparation time. These units typically reach cooking temperature within 15-20 minutes and maintain consistent heat throughout your cooking session. Temperature control becomes precise and reliable, allowing you to dial in exact cooking environments.
Ooni Koda 16 Gas OvenGas systems particularly benefit cooks who prioritize convenience and consistency. Without the need for fire management, you can focus entirely on dough handling, topping application, and cooking technique refinement. This makes gas ovens ideal for beginners and for situations where quick setup and breakdown are priorities.
The Cooking Process: Step by Step
With your station prepared and oven at temperature, the actual cooking process demands attention, timing, and quick decision-making. Each pizza presents a brief window for perfection.
Pre-Cook Preparation
Before launching your first pizza, verify your stone temperature and ensure your workspace is organized. Have all toppings prepared and within reach. Dust your wooden peel generously with flour or semolina – this crucial step prevents the disaster of dough adhering to the peel during launch.
Stretch your dough on a floured surface to your desired thickness, then transfer immediately to the prepared peel. Work quickly but deliberately when adding sauce and toppings – extended time on the peel increases sticking risk. Keep toppings relatively light; overloaded pizzas cook unevenly and become difficult to manage.
The Launch and Cook
Launching pizza requires confident, decisive movement. Position your loaded peel at a shallow angle to the stone, then use a quick, jerking motion to slide the pizza onto the hot surface. A properly floured peel releases the dough smoothly in one motion.
Cooking times vary based on oven temperature and pizza style, but most pizzas complete in 60-120 seconds at optimal temperatures. Watch the crust edges – they should develop a deep golden color with characteristic leopard spotting. The cheese should bubble enthusiastically and begin showing light brown spots.
Rotation and Finishing
Most ovens have hot spots requiring mid-cook rotation. After approximately 30-45 seconds, use your metal peel to rotate the pizza 180 degrees. This ensures even cooking and prevents burnt sections. The goal is uniform crust development and evenly melted cheese across the entire pizza.
When the bottom crust achieves the desired char and the toppings are properly cooked, slide your metal peel completely under the pizza and remove it in one smooth motion. Transfer immediately to a cutting surface – continuing to cook on the peel produces soggy bottoms.
Troubleshooting Common Challenges
Even experienced pizza makers encounter occasional difficulties. Understanding solutions to common problems accelerates your learning curve.
Dough Sticking Issues
If dough consistently sticks to your peel, you're likely using insufficient flour or taking too long during topping application. Work faster, use more dusting flour, or switch to semolina which provides superior non-stick properties. Some chefs use parchment paper as a foolproof solution, sliding the paper and pizza together onto the stone, then removing the paper after 30 seconds of cooking.
Uneven Cooking Results
Consistently undercooked centers with burnt edges indicate insufficient pre-heating or incorrect stone temperature. Allow more pre-heat time and verify temperatures with your infrared thermometer. Conversely, if toppings burn before the crust cooks, reduce oven temperature slightly or move pizzas further from direct flame.
Soggy or Dense Crust
This common frustration typically stems from wet dough, excessive toppings, or inadequate cooking temperature. Ensure your dough has proper hydration levels (typically 60-65% for pizza dough), drain wet ingredients before application, and verify your stone reaches minimum required temperatures before cooking.
Maintenance and Long-Term Care
Proper maintenance extends your oven's lifespan and ensures consistent performance across years of use. Fortunately, pizza ovens require relatively simple care routines.
After Each Session: Allow your oven to cool completely before cleaning. For wood-fired units, remove ash buildup using appropriate tools once cool. The cooking stone itself requires minimal intervention – most cleaning occurs naturally during the pre-heat process as residual food particles burn away. Avoid using soap or water on your stone, as it's porous and will absorb these substances.
Exterior surfaces may require periodic wiping with appropriate cleaners, depending on your oven's construction materials. Stainless steel benefits from specialized cleaners that maintain appearance while protecting against corrosion. Pay particular attention to seals, gaskets, and moving parts, which may require occasional lubrication or adjustment.
Weather Protection
For portable ovens or those without permanent shelter, invest in quality weather covers. Even weather-resistant materials benefit from protection against prolonged exposure to sun, rain, and temperature fluctuations. Proper covering prevents premature deterioration and maintains optimal performance characteristics.
Expanding Your Pizza Repertoire
Once you've mastered basic pizza techniques, your outdoor oven opens doors to culinary exploration beyond traditional pies. These versatile cooking chambers excel at various high-heat applications.
Consider experimenting with flatbreads, focaccia, and artisan bread baking. The intense heat and stone surface produce exceptional crust characteristics impossible to achieve in conventional ovens. Many chefs discover their pizza ovens become their preferred method for roasting vegetables, cooking steaks, or even baking desserts.
The key to successful experimentation lies in understanding heat zones within your oven. Direct flame areas provide intense searing heat, while stone-only areas offer gentler, more even cooking. Learning to leverage these zones expands your outdoor cooking capabilities exponentially.
Conclusion: Your Journey to Pizza Excellence
Mastering outdoor pizza oven cooking represents a rewarding journey combining technical skill, creative expression, and the simple pleasure of sharing exceptional food with others. Whether you choose the traditional path of wood-fired cooking or embrace the convenience of gas-powered systems, the fundamental principles remain consistent: quality ingredients, proper technique, and attention to detail.
Start with basic recipes and standard approaches, then gradually incorporate advanced techniques as your confidence grows. Each cooking session provides learning opportunities, and even imperfect pizzas teach valuable lessons. The combination of immediate feedback and rapid cooking times accelerates skill development, transforming beginners into accomplished outdoor chefs within surprisingly short timeframes.
Your backyard pizza oven investment extends beyond equipment – it creates gathering spaces, facilitates memorable experiences, and develops skills you'll refine over years of enjoyment. The path from first attempt to consistently excellent results may seem challenging initially, but the destination proves absolutely worth the effort.
Embrace the process, celebrate your successes, learn from occasional setbacks, and most importantly, enjoy the incredible pizzas you'll create. Your outdoor pizza oven awaits, ready to transform your backyard into a destination for authentic, delicious, and memorable meals.