
pegboard serves as an exceptional solution for keeping your tools organized and accessible. Rather than rummaging through cluttered drawers or hunting inside cabinets, everything you need remains visible and within arm's reach.
However, achieving true efficiency requires more than simply mounting a board and hanging tools randomly. Proper setup demands thoughtful consideration of placement, hook selection, and spatial arrangement. Below you'll discover practical guidance for transforming your pegboard into an organized workspace masterpiece.
What Items Belong on a Pegboard?
Before diving into organization methods, consider the variety of items suitable for pegboard storage. Essentially, anything featuring a hole or hook point works perfectly. Common candidates include hand tools like hammers, screwdrivers, pliers, and wrenches. Power tools such as drills and jigsaws hang beautifully as well. Crafting supplies including scissors and rulers find their place easily, while kitchen implements like spatulas and ladles work wonderfully for culinary pegboards.
With appropriate hooks and accessories, virtually anything can find a home on your pegboard system.
Which Pegboard Material Should You Select?
Your garage or workshop might already contain a pegboard, but if you're starting fresh, several material options exist. Pegboards range from compact panels to wall-spanning installations covering entire surfaces.
Material construction typically involves either metal or plastic composition. Metal pegboards deliver superior durability and support heavier items compared to their plastic counterparts. However, plastic versions often prove more budget-friendly and handle lighter tools adequately.
Many users gravitate toward colored pegboards that integrate seamlessly with their workspace aesthetics, though lighter shades enhance visibility in dimmer environments. Specialty retailers offer pegboard kits complete with diverse hooks and holders for immediate setup. Explore various configurations to discover the perfect match for your customized organization system.
Essential Pegboard Organization Techniques
With your pegboard mounted and tools gathered, implement these strategies for optimal arrangement.
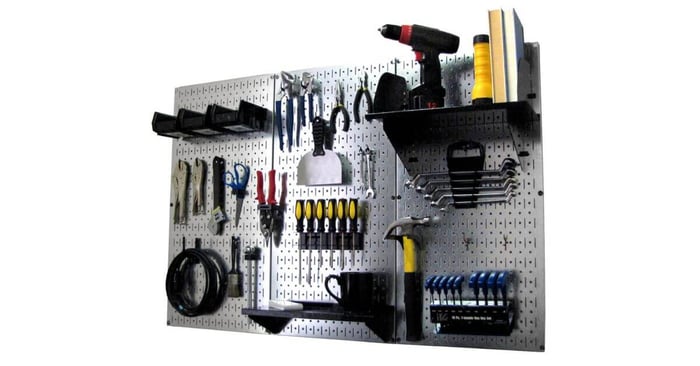
1. Categorize Your Tools by Function
Before placing anything on the pegboard, organize your tools into logical groupings. This preliminary step reveals exactly how much space each category demands and where items should reside on the board. Typical groupings encompass hand tools, power tools, gardening equipment, and painting supplies.
After establishing categories, map out your layout strategically. Position frequently-used items at easily accessible heights, relegating seldom-used tools to upper or peripheral locations.
2. Employ Diverse Accessory Types
Hooks represent the standard pegboard accessory, but limiting yourself to one style wastes potential. Incorporate shelving units, bins, and specialty holders to accommodate various tool types and equipment. A shelf might corral small items like screws or nails, while a jar holder keeps spray paint cans or lubricants consolidated.
Consider basket attachments or holders designed for oddly-shaped items such as hammers or pliers. These specialized accessories maintain tool orientation and prevent items from tumbling off the board.
3. Maximize Vertical Dimensions
Avoid arranging tools exclusively in horizontal rows. Utilize vertical space by installing hooks, cords, or measuring tape holders that exploit upward territory. Vertical arrangement liberates horizontal real estate for larger tools while keeping everything accessible.
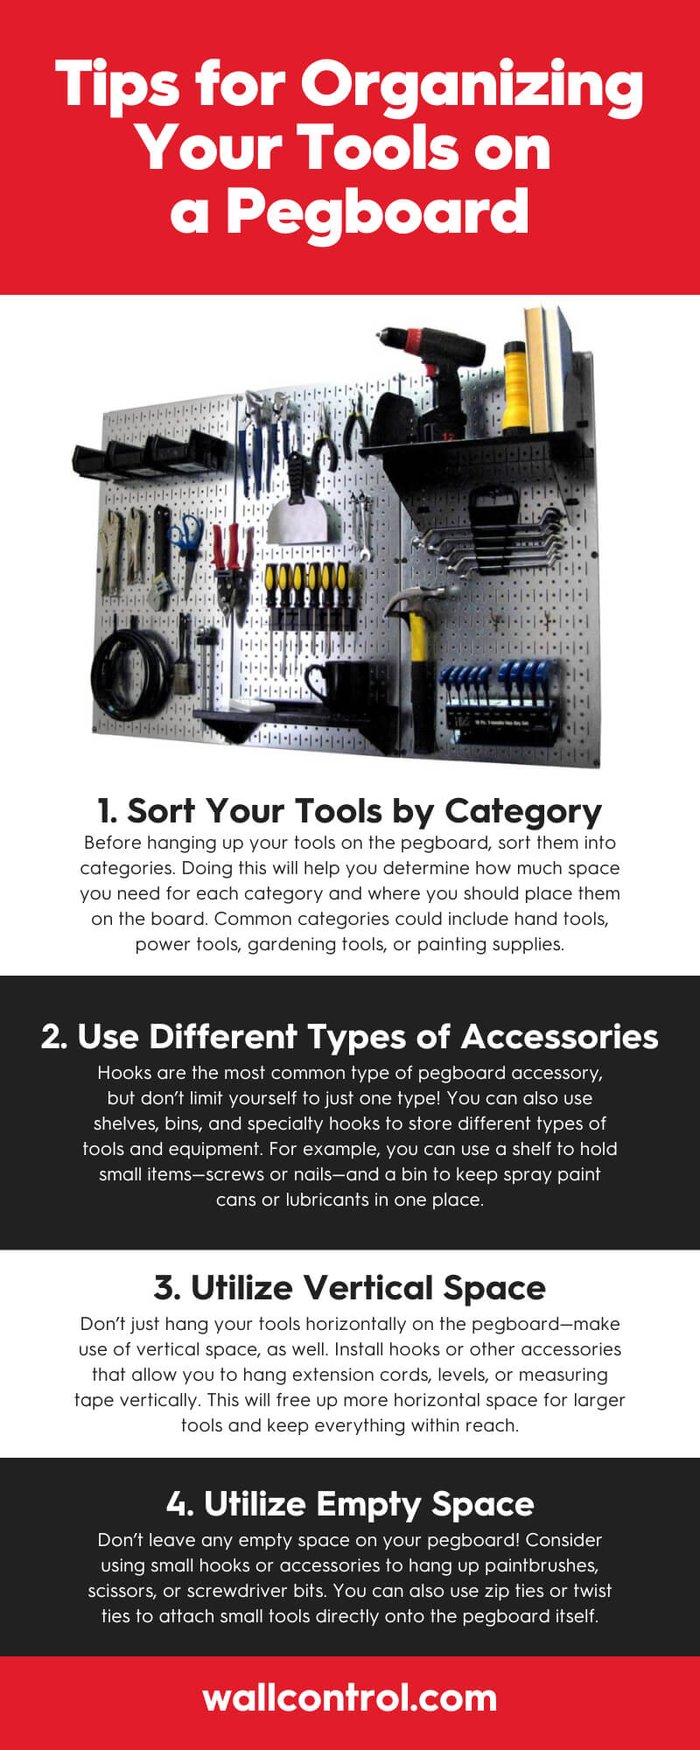
4. Capitalize on Empty Spaces
Examine your pegboard for underutilized areas. Small baskets or accessory holders can accommodate paintbrushes, scissors, or screwdriver bits. Zip ties or heat-shrink tubing work excellently for securing smaller tools directly to the board surface.
5. Implement Tool Labeling
Streamline tool retrieval and return by labeling each position with the corresponding tool name or category. Adhesive labels, tape strips, or permanent markers all accomplish this effectively. Proper labeling prevents misplacement and ensures every item returns to its designated spot.
6. Establish a Color-Coding System
Enhance organization further by assigning different colored hooks or labels to each tool category. For instance, all hand tools might feature red labels while power tools display blue markers. This visual system accelerates identification and maintains categorical integrity on your pegboard.
7. Periodically Review and Reorganize
As your tool collection evolves and project demands shift, your current arrangement may become inefficient. Conduct regular assessments and implement adjustments to maintain peak functionality. Experimentation reveals optimal configurations, and once you identify that perfect setup, maintaining order becomes effortless.
Implementing these organizational strategies transforms your pegboard into a highly functional workspace centerpiece. When every tool occupies a designated location, you'll spend less time searching and more time completing projects. Find your ideal arrangement, maintain it consistently, and enjoy knowing exactly where every tool resides.
Ready to upgrade your workshop organization?
Trinity Pro Rolling Workbench w/ Pegboard