Every serious craftsman understands that a quality workbench serves as the foundation of any productive workshop. Whether you're tackling woodworking projects, performing equipment maintenance, or building furniture for your outdoor living space, having a sturdy workbench with ample storage transforms your workflow entirely. This comprehensive guide walks you through constructing a robust workbench that combines durability with intelligent storage solutions.
Why Construct Your Own Heavy-Duty Workbench?
Purchasing a pre-made workbench often means compromising on dimensions, storage capacity, or build quality. When you construct your own, you gain complete control over every specification. You determine the exact height that prevents back strain during extended projects. You decide how many drawers, shelves, and compartments suit your specific tool collection. Most importantly, you build something that lasts generations rather than years.
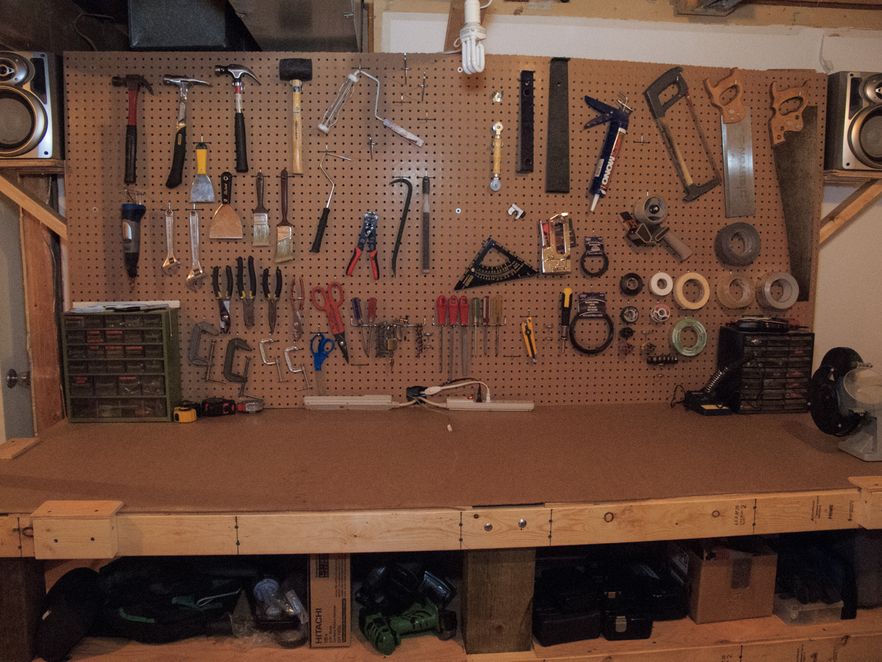
A well-designed workbench with integrated storage eliminates clutter, keeps essential tools within arm's reach, and creates dedicated spaces for hardware, fasteners, and accessories. The pegboard backing alone can hold dozens of frequently used implements, freeing up valuable drawer space for items requiring protection from dust and debris.

Essential Materials and Components
Selecting appropriate materials determines both the longevity and functionality of your finished workbench. For the frame structure, dimensional lumber such as 2x4s and 4x4s provides exceptional strength while remaining cost-effective. The worktop surface demands particular attention since it endures the most abuse. Medium-density fiberboard (MDF) or high-quality plywood topped with hardboard creates a smooth, replaceable work surface.
Storage components require careful planning. Drawer slides rated for substantial weight ensure smooth operation even when loaded with heavy hand tools. Standard pegboard panels offer versatile organization options with countless hook and holder configurations available. Quality wood screws, carriage bolts, and wood glue complete your fastener requirements for a rock-solid assembly.
Constructing the Base Frame
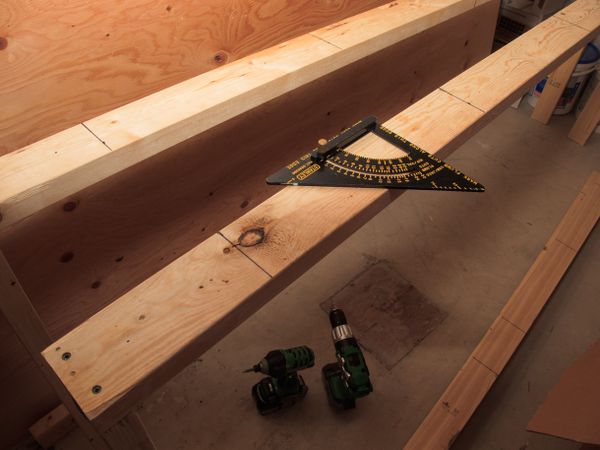
The base frame establishes the structural integrity of your entire workbench. Begin by cutting your 4x4 posts to your desired height, typically between 34 and 38 inches depending on your stature and working preferences. These vertical members support everything above, so ensure perfectly square cuts and inspect each piece for warping or significant defects.
Connect the posts using 2x4 horizontal rails at both top and bottom positions. This creates a rigid rectangular framework capable of supporting hundreds of pounds without flexing. Apply wood glue to all joints before driving screws, creating bonds stronger than either method alone. Some builders prefer dado joints or mortise and tenon connections for superior strength, though these require additional tools and expertise.
Installing diagonal bracing between the rear posts prevents lateral movement and racking. This simple addition dramatically increases stability, especially important when performing tasks requiring significant force like planing or chiseling.

Integrating Storage Solutions
Strategic storage integration separates an ordinary workbench from an exceptional one. The space beneath the worktop offers prime real estate for drawer banks or open shelving. Consider your specific needs when deciding between these options. Drawers protect contents from sawdust and provide organized compartmentalization. Open shelves accommodate larger items and allow quick access without opening anything.
Installing drawer slides requires precise measurements and careful alignment. Ball-bearing slides rated for 100 pounds or more handle tool-laden drawers without complaint. Mount the cabinet portions first, using spacer blocks to ensure consistent positioning. Attach drawer portions only after verifying perfect horizontal alignment with a level.
Above the worktop, a pegboard panel transforms vertical space into accessible storage. Cut the pegboard to fit between your rear posts, leaving adequate clearance for hooks to insert properly. Mounting the panel with spacers creates the necessary gap between pegboard and backing surface.

Crafting the Worktop Surface
Your worktop surface endures constant contact with tools, materials, and projects. Building a layered top provides both durability and replaceability. Start with a base layer of three-quarter inch plywood secured firmly to the frame rails. This foundation spreads loads evenly across the entire structure.
Adding a sacrificial top layer of hardboard or MDF creates the actual work surface. When this layer inevitably accumulates damage, simply remove it and install fresh material within minutes. This approach costs far less than replacing an entire solid-wood top while maintaining excellent functionality.
Consider incorporating a front lip or overhang extending beyond the drawer faces. This allows clamping workpieces to the front edge, expanding your holding options considerably. A thickness of one and a half to two inches provides adequate clamping purchase without excessive material waste.
Building Sturdy Drawer Boxes
Drawer construction demands attention to detail for smooth, lasting operation. Cut drawer sides from half-inch plywood, sizing them to match your slide specifications exactly. Most slides require specific clearances on each side, so consult manufacturer instructions before making any cuts.
Assemble boxes using rabbet joints at corners for maximum strength. A simple table saw dado blade setup creates these joints quickly and accurately. Glue and brad nail the joints, then check each box for square before the adhesive sets. Quarter-inch plywood bottoms slide into grooves cut near the lower edges, completing robust boxes ready for decades of service.
Drawer faces attach after installing boxes on their slides. This allows fine-tuning their positions for uniform gaps and aligned edges. Use washer-head screws driven from inside the box, permitting adjustment before final tightening.

Installing the Pegboard Backing
The pegboard backing multiplies your storage capacity without consuming any floor space. Standard pegboard comes in quarter-inch thickness with holes spaced one inch apart, accommodating virtually any hook or bracket system available. For heavier tools, consider upgrading to metal pegboard designed for industrial applications.
Creating proper standoff distance between the pegboard and wall surface allows hooks to insert fully. Stack furring strips or wooden spacers at mounting points to achieve this gap. Secure the pegboard firmly with screws at regular intervals, preventing flexing when removing tools.
Organize your pegboard thoughtfully once installed. Group similar tools together in logical arrangements. Trace tool outlines on the board surface to indicate proper placement, making it simple to return items to their designated spots. This visual system maintains organization even during hectic projects.
Applying Finishing Touches
Finishing your workbench protects the wood while enhancing its appearance. Sand all exposed surfaces progressively through finer grits, eliminating splinters and rough spots. A final pass with 220-grit paper creates a surface ready for finish application.
Choose finishes appropriate for workshop conditions. Polyurethane provides excellent protection against moisture and chemicals while remaining reasonably affordable. Apply multiple thin coats rather than single heavy applications for best results. Allow adequate drying time between coats as specified by the manufacturer.
Install drawer pulls and any additional hardware after finishing. Consider soft-close mechanisms for drawer slides if not already incorporated. Add rubber feet or leveling pads to the base, protecting your floor while ensuring stability on uneven surfaces.

Professional Tips for Superior Results
Experienced builders understand that small details create significant differences in finished projects. Always pre-drill holes near board edges to prevent splitting. Use combination bits that drill pilot holes and countersinks simultaneously, saving time while improving results.
Consider future modifications during initial construction. Running electrical conduit through the frame allows adding outlets or lighting later without visible wiring. Incorporating T-tracks in the worktop surface provides clamping points anywhere along their length.
Build slightly larger than you think necessary. Workshop projects inevitably expand to fill available space, and extra workbench area always proves useful. An additional six inches of depth or length costs little during construction but pays dividends throughout the workbench's lifespan.

Prefer a Ready-Made Solution?
Not everyone has the time, tools, or inclination to build their own workbench from scratch. If you want professional-grade quality without the construction process, consider a premium pre-built option that delivers exceptional durability and storage capacity right out of the box.
Final Thoughts
Constructing a heavy-duty workbench with comprehensive storage represents one of the most rewarding shop projects you can undertake. The finished product serves as command central for countless future endeavors, providing a stable, organized workspace that elevates every project you tackle.
Whether you build your own following these guidelines or opt for a quality manufactured solution, investing in a proper workbench transforms your workshop experience. The combination of robust construction, ample storage, and thoughtful design creates an environment where creativity flourishes and productivity soars. Your future self will thank you every time you walk into your well-equipped workspace.